How to Run Jupyter Notebook on AWS EC2 Instance
How to run jupyter notebook on AWS EC2 instance
After creating EC2 instance follow the following steps to run a jupyter notebook. Jupyter notebook uses port 8888 to access the web interface. When you create the instance make sure to add port 8888 under security policy configurations before launching so that you will be able access your jupyter notebook later.
1. Install Conda (Miniconda)
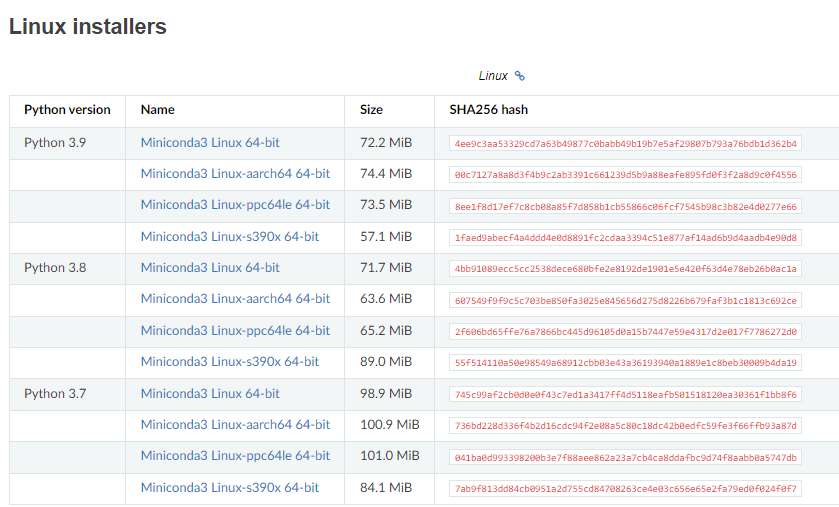
From the official website https://docs.conda.io/en/latest/miniconda.html find the right link based on your python version.

Copy the address link and download the setup file using
wget https://repo.anaconda.com/miniconda/Miniconda3-py38_4.11.0-Linux-x86_64.sh
Run the setup
chmod +x ./Miniconda3-py38_4.11.0-Linux-x86_64.sh && ./Miniconda3-py38_4.11.0-Linux-x86_64.sh
Install Jupyter Lab
Using conda install Jupyter lab using
conda install -c conda-forge jupyterlab
Setup password
Inside ~/.jupyter directory create a new file ` jupyter_server_config.py`
touch .jupyter/jupyter_server_config.py
    c.ServerApp.ip = '*' # bind to any network interface
    c.ServerApp.password = u'<your hashed password here>'
    c.ServerApp.open_browser = False
    c.ServerApp.port = 8888 # or any other ports you'd like
To setup a jupyter password
jupyter server password
The above command will ask you to enter a password. Once you’re done, you will get a json file with jupyter_server_config name. Copy the hashed password from this file and past it to ` jupyter_server_config.py`.
You’re done! run jupyter lab and use your public ip to access your notebook.
Attach EFS
— attach EFS to the instance
-
Create efs You can go to AWS’s EFS and create an efs. This will allow you to store your important data even after you closed your EC2 instance
-
Mount the efs After creating efs, you will find a button that says “Attach”. Click on it and you’ll find a command to execture on your terminal to attach the efs. But before that make sure to create
efsfolder in your instance.sudo mount ******.amazonaws.com:/ efs -
This is an optional command. It allows you to use the temporary storage instance available along with your EC2.
sudo mkfs -t xfs /dev/nvme1n1 -
Mount the storage
sudo mkdir ~/data && sudo mount /dev/nvme1n1 ~/data -
Allow read/write persmission
sudo chmod go+rw data -
Extract your data
tar -xf efs/*.tar && source .bashrc
All Combined
    mkdir efs
    sudo mount *** .amazonaws.com:/ efs
    sudo mkfs -t xfs /dev/nvme1n1
    sudo mkdir ~/data && sudo mount /dev/nvme1n1 ~/data
    sudo chmod go+rw ~/data
    tar -xf efs/*.tar && source .bashrc
Persist config data to EFS
If you want to store your data fter you’re done with your work;
sudo tar -cf ~/efs/*.tar ./miniconda3 .kaggle .ipython .jupyter .conda .bashrc
Python 3.8
    sudo apt install python3.8
    sudo update-alternatives --install /usr/bin/python python /usr/bin/python3.8.1
    sudo update-alternatives --config python
Note: this note is adapted from https://chen-zhe.github.io/blog/p/aws-user-notes-for-deep-learning/